Why Stove Installation Matters
- Safety: Improper installation can cause fires, carbon monoxide leaks, or property damage.
- Efficiency: Correct setup ensures your stove heats effectively and uses less fuel.
- Code Compliance: Required for insurance, home resale, and legal operation.
- Longevity: A properly installed stove lasts longer and requires fewer repairs.
Universal Steps for Installing Any Heating Stove
- Choose the Right Location: Away from combustible materials, with adequate space for clearance and venting.
- Prepare the Floor & Wall: Use a non-combustible hearth pad or approved flooring; install wall shields if needed.
- Plan the Venting: Select the correct chimney, flue, or vent pipe system for your stove type.
- Check Local Codes & Permits: Obtain necessary permits, follow all building codes and manufacturer instructions.
- Install with Proper Tools: Have the right tools, fasteners, and safety gear for your project.
- Test Safety Devices: Install and verify smoke and CO detectors in the stove area.
Tip: When in doubt, hire a certified installer—especially for gas, pellet, or coal stoves.
Site Preparation: Location, Clearances & Flooring
- Follow Manufacturer’s Minimum Clearances: Usually 36" from combustibles for wood/coal, less for gas/electric (see manual).
- Install a Non-Combustible Hearth Pad: Required for wood, pellet, and coal stoves. Must extend in front, sides, and under the stove per code.
- Wall Shields: Use if installing near walls—these reduce required clearances.
- Level Surface: Ensure floor can support stove weight and is level.
Venting & Chimney Requirements by Stove Type
Wood & Coal Stoves
- Require a UL-listed Class A chimney system or approved masonry flue.
- Chimney must extend above roofline per code (typically 3 feet above the roof and 2 feet higher than anything within 10 feet).
- Use double-wall or insulated stovepipe for interior runs; maintain proper pitch and minimize bends.
- Install a chimney cap to prevent rain, debris, and animals.
Pellet Stoves
- Use Type L vent pipe—smaller diameter, may vent horizontally or vertically.
- Direct venting through an exterior wall is common; seal all joints tightly.
- Vertical runs improve natural draft and prevent backdrafts during power loss.
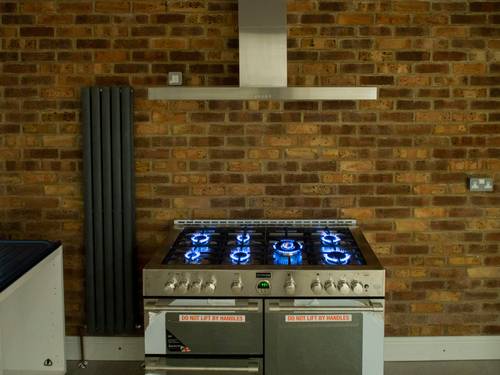
Gas Stoves
- Direct vent models use concentric (coaxial) pipe for intake and exhaust.
- Vent-free stoves require no vent but are subject to local code restrictions.
- Professional installation recommended—improper venting can be deadly.
Electric Stoves
- No venting or chimney required—just plug into a grounded wall outlet.
- Follow all manufacturer placement recommendations for airflow and safety.
Permits, Codes & Professional Installation
- Check local building/fire codes before starting any installation.
- Obtain permits where required (wood, pellet, gas, and coal stoves often need inspection).
- Professional installation is mandatory for most gas appliances and recommended for pellet/coal stoves.
- Keep documentation of installation and inspections for insurance and resale.
- Do not modify or bypass safety switches, dampers, or code requirements.
Essential Tools & Supplies for Installation
- Drill/driver, level, tape measure, stud finder, utility knife
- Masonry tools (if installing or modifying a chimney)
- High-temperature silicone sealant, fire-rated caulk, metal screws
- Non-combustible hearth pad or floor protector
- Pipe wrenches, pliers, and leak detector for gas stoves
- Personal protective equipment: gloves, goggles, dust mask
Step-by-Step: Installing Each Stove Type
Wood & Coal Stove Installation
- Lay out and install hearth pad/floor protector.
- Mark wall clearances and shield locations (if needed).
- Assemble and connect stovepipe to stove and chimney.
- Secure and seal all joints with fire-rated sealant; screw sections together.
- Install chimney cap and check for proper draft.
- Test smoke and CO alarms before first use.
Pellet Stove Installation
- Install hearth pad and position stove according to clearances.
- Drill hole for vent pipe (if direct venting); use wall thimble for fire safety.
- Connect type L vent pipe, sealing all joints tightly.
- Plug into grounded outlet; test all controls and safety switches.
- Fill hopper and test burn under supervision.
Gas Stove Installation
- Have gas line run and pressure tested by a licensed technician.
- Install direct vent or vent-free system per manufacturer specs.
- Seal all vent joints and test for gas leaks (soapy water test).
- Connect to power (if electronic ignition).
- Test pilot, main burner, and all safety devices.
Electric Stove Installation
- Place stove on a flat, stable surface with recommended clearance to walls/furniture.
- Plug directly into a grounded 120V wall outlet—never use extension cords.
- Test controls, flame effect, and heater function.
Post-Installation Safety Checks
- Verify all clearances, shields, and venting are correct and secure.
- Test stove operation at low and high settings.
- Check for leaks (gas, smoke, CO) and correct before use.
- Have installation inspected if required by local code or your insurance.
- Keep manufacturer manuals and installation documents in a safe place.
Common Stove Installation Mistakes to Avoid
- Ignoring clearance requirements—major fire risk!
- Using the wrong vent type or size for your stove/fuel.
- Improper sealing of vent joints—can lead to leaks or poor draft.
- Failing to install smoke or CO detectors nearby.
- DIY gas line work—always hire a pro for gas connections.
- Not obtaining permits—can void insurance and cause legal issues.
Stove Installation FAQs
- Can I install a stove myself? DIY is possible for some wood, pellet, or electric stoves, but gas and most pellet/coal stoves should be professionally installed for safety and code compliance.
- Do I need a permit? Most municipalities require permits for solid fuel stoves—always check with your local building department before starting.
- Can I vent multiple stoves into one chimney? Never combine vent systems—each stove should have a dedicated flue to prevent dangerous backdrafts.
- How do I know if my venting system is safe? Have it inspected by a certified professional, especially if using an existing masonry chimney.
- Can I use my stove during a power outage? Wood and hand-fired coal stoves work without power; most pellet and electric stoves require electricity, unless equipped with backup systems.
When to Call a Professional Installer
- Gas line or propane appliance installation
- Chimney/venting repairs or new chimney construction
- Retrofitting old fireplaces for inserts or changing fuel types
- Complex multi-story vent runs or tight spaces
- Questions about code, safety, or insurance requirements
Remember: The cost of professional installation is small compared to the risk of fire, carbon monoxide, or insurance loss from a DIY mistake.
Related Guides
Stove Safety Tips
Protect your family and property—essential safety practices for every stove type before and after installation.
Read Safety TipsStove Maintenance Guide
Keep your new stove running safely and efficiently with our expert maintenance routines.
Maintenance GuideStove Ventilation Explained
Understand venting requirements, air quality, and code compliance for every stove type.
Venting Guide